

Vue3
使用Vue-cli创建项目后,main.js中的内容为
// 引入的不再是构造函数,而是工厂函数,createApp是一个工厂函数
import { createApp } from 'vue'
import App from './App.vue'
import router from './router'

// 使用工厂函数创建实例对象,链式调用
createApp(App).use(router).mount('#app')
vue2的main.js的内容
// 这个文件是入口文件

// 引入vue
import Vue from 'vue'
// 引入app组件,是所有组件的父组件
import App from './app.vue'
// 关闭生产环境提示
Vue.config.productionTip = false

// 创建vm实例对象
new Vue({
  // 将app组件放入到容器中
  render: h => h(App),
}).$mount('#root')
最大的变化:
-
<template></template>中可以没有根标签,这是因为引入了一个虚拟的元素fragment,相当于放入了这个虚拟元素 -
以下文件就有两个根标签
-
<template>
  <div id="nav">
    <router-link to="/">Home</router-link> |
    <router-link to="/about">About</router-link>
  </div>
  <router-view/>
</template>
setup()
在Vue3中,所有的数据、方法都可以写在这个方法中,这个方法允许使用async进行修饰
在这个方法中定义的函数如果想要使用一些数据时,无需再使用this进行引用,变量的定义直接使用let 变量名 = 值定义,如果想要再模板中使用定义的一些属性和方法,需要将这个方法的返回值可以是这个方法中定义的所有的变量和函数的对象,只有返回的值才能够在页面上使用
<template>
  <div id="nav">
      <button @click="hello">
          按钮
      </button>
  </div>
</template>
<script>
export default {
    name: 'App',
    setup() {
        let user = {
            name: 'John Doe',
            age: 30
        }

        let hello = () => {
            alert('Hello ' + user.name)
        }
        return {
            hello
        }
    }
}

</script>
使用这种方式会使页面失去响应式,即当数据更新时,页面上的渲染的内容不会自动改变
Vue2中的data()、methods()等方法依旧还可以继续使用
传统方式和setup对比:
<template>
    <div id="nav">
        <button @click="tradition">传统方式读取setup中的数据</button>
        <br>
        <br>
        <br>
        <button @click="v3">setup读取传统方式中的数据</button>
    </div>
</template>
<script>
export default {
    name: 'App',
    data() {
        return {
            msg: 'Hello Vue!'
        }
    },
    methods: {
        tradition() {
            console.log(this.msg);
            console.log(this.user);
        }
    },
    setup() {
        let user = {
            name: 'John Doe',
            age: 30
        }

        let v3 = () => {
            console.log(user)
            console.log(this.msg)
        }

        return {
            v3,
            user
        }
    }
}
传统方式可以读取到setup中所返回的数据、方法,但setup无法读取到定义在data()、methods()中的数据、方法等
如果两者冲突,则将会以setup的为准
ref()
在setup()中如果对数据更改,页面不会进行渲染:
<template>
    <p>{{user}}</p>
    <br>
    <button @click="change">修改</button>
</template>

<script>


export default {
    name: 'App',
    setup() {
        let user = {
            username: "用户名",
            password: "pass"
        }

        let change = () => {
            user.username = 'admin'
        }

        return {
            user,
            change
        }
    }
}
</script>
例如上例中点击按钮后,实际的值会被修改,但不会直接进行重新渲染,页面上还是显示的原来的内容
如果想要达到渲染的效果,需要使用ref()函数
使用前需要先导入:
import {ref} from 'vue';
赋值时采用let 变量名 = ref(值),修改值时通过变量名.value = 值,数组也可以通过变量名.value[下标]进行访问
<template>
    <p>{{user}}</p>
    <p>用户名:{{user.username}}</p>
    <p>密码:{{user.password}}</p>
    <p>{{info}}</p>
    <br>
    <button @click="change">修改</button>
</template>

<script>
import {ref} from "vue";

export default {
    name: 'App',
    setup() {
        let user = ref({
            username: "用户名",
            password: "密码"
        })

        let info = ref("aaa")

        let change = () => {
            info.value = "一个值";
            user.value.username = "admin";
            user.value.password = "这是密码.";
        }

        return {
            user,
            change,
            info
        }
    }
}
</script>
在模板中{{}}不需要通过.value获取值,因为会自动解析
reactive()
reactive(对象)仅能用于修饰对象(对象类型包括数组,但不包括String类型),需要提前引入:
import {reactive} from "vue";
在修改值的时候,无需在使用value:
<template>
    <p>{{person}}</p>
    <p>名字:{{person.name}}</p>
    <p>性别:{{person.sex}}</p>
    <br>
    <button @click="change">修改</button>
</template>

<script>
import {ref} from "vue";
import {reactive} from "vue";

export default {
    name: 'App',
    setup() {
        let person = reactive({
            name: "人",
            sex: "男"
        })

        let info = ref("aaa")

        let change = () => {
            person.name = "大人";
            person.sex = "女";
        }

        return {
            change,
            person
        }
    }
}
</script>
而传入ref()的对象也是交给reactive()进行处理的,这也是对象的各个属性不需要再通过value取出的原因
vue2如果对数组直接取下标修改值或者删除某个对象的属性,页面将不会自动渲染:
<template>
	<div>
        <p>{{arr}}</p>
        <button @click="change">修改值</button>
         <p>{{obj}}</p>
    </div>
</template>

<script>
    data() {
        return {
            arr: [11, 33, 555, 6],
            obj: {
                name: "admin"
            }
        }
    }
    methods: {
        change() {
            arr[2] = 1;
            obj.age = 1;
        }
    }
</script>
当按钮点击后,数组中的值并不会直接修改,name属性也不会呈现到页面上,这是因为vue2对每个对象或者元素都进行了二次封装,从而达到值改变时自动渲染,而vue3没有这个问题,当值改变时将会自动渲染
vue2针对对象添加属性的问题可以通过this.$set(对象, "属性名", 值)
正因为有了reactive(),vue3中执行以上vue2中没有效果的操作时才能体现出效果
原理是采用proxy进行了代理:
let person = {
    name: "张三",
    age: 100
};
let p = new Proxy(person, {
    get(target, prop) {
        console.log("获取属性");
        return target[prop];
    },
    set(target, prop, value) {
        console.log("设置属性");
        target[prop] = value;
        return target;
    },
    deleteProperty(target, prop) {
        console.log("删除属性");
        return delete target[prop];
    }
});

> p
  Proxy {name: '张三', age: 100}
> p.age
  获取属性
  100
> p.name
  获取属性
  '张三'
> p.old = 100
  设置属性
> 100
> delete p.old
  删除属性
还通过Reflect对象进行删除、添加、修改值的操作
setup()的生命周期要早于beforeCreate(),因此如果这个时候尝试获取this,将会返回undefined
setup(props, context)函数有两个参数,第一个参数为Proxy类型的参数,第二个参数中包含插槽slot、事件emit等信息
自定义事件
子组件向父组件传递的自定义事件此时可以通过第二个参数context.emit('事件名', 数据)的方式进行发送
子组件:
<template>
    <p>6666</p>
    <button @click="send">发送自定义事件</button>
</template>

<script>
export default {
    name: "MyComponent",
    emits: ['hello'],
    setup(props, context) {
        console.log(props);
        console.log(context);

        let send = () => {
            context.emit("hello", "你好,世界");
        }
        return {
            send
        }
    }
}
父组件:
<my-component @hello="myHandler" />

let myHandler = (value) => {
    alert(value);
}
计算属性
vue2的计算属性依旧可用
需要引入:
import {computed} from 'vue';
<template>
    姓:<input type="text" v-model="person.firstName"> <br>
    名:<input type="text" v-model="person.lastName">
    <p>{{fullName}}</p>
</template>

<script>
import {computed, reactive} from "vue";

export default {
    name: 'App',
    setup() {
        let person = reactive({
           firstName: "张",
           lastName: "三"
        });

        let fullName = computed(() => {
            return `${person.firstName}----${person.lastName}`;
        })

        return {
            person,
            fullName
        }
    },
    components: {

    }
}
</script>
以上代码可以继续优化,可以将fullName()直接放到person对象身上
<template>
    姓:<input type="text" v-model="person.firstName"> <br>
    名:<input type="text" v-model="person.lastName">
    <p>{{person.fullName}}</p>
</template>

<script>
import {computed, reactive} from "vue";

export default {
    name: 'App',
    setup() {
        let person = reactive({
           firstName: "张",
           lastName: "三"
        });

        person.fullName = computed(() => {
            return `${person.firstName}----${person.lastName}`;
        })

        return {
            person
        }
    },
    components: {

    }
}
</script>
watch
也可以用vue2的方式
需要引入:
import {watch} from 'vue';
<template>
    <p>{{sum}}</p>
    <button @click="sum++">+1</button>
</template>

<script>
import {ref, watch} from "vue";

export default {
    name: 'App',
    setup() {
        let sum = ref(0);
        watch(sum, (newValue, oldValue) => {
            console.log('sum 改变了旧值为:', oldValue, "新值为:", newValue)
        })
        return {
            sum
        }
    },
    components: {

    }
}
</script>
也可以监视多个属性:
<template>
    <p>{{sum}}</p>
    <button @click="sum++">+1</button>
    <p>{{msg}}</p>
    <button @click="msg += '.'">改变消息</button>
</template>

<script>
import {ref, watch} from "vue";

export default {
    name: 'App',
    setup() {
        let sum = ref(0);
        let msg = ref("消息");
        watch(sum, (newValue, oldValue) => {
            console.log('sum 改变了旧值为:', oldValue, "新值为:", newValue)
        });

        watch(msg, (newValue, oldValue) => {
            console.log('msg 改变了旧值为:', oldValue, "新值为:", newValue)
        });

        return {
            sum,
            msg
        }
    },
    components: {

    }
}
这时候会发现msg和sum所监视的事件的处理方式都差不多,因此可以将msg和sum作为一个数组给watch():
<template>
    <p>{{sum}}</p>
    <button @click="sum++">+1</button>
    <p>{{msg}}</p>
    <button @click="msg += '.'">改变消息</button>
</template>

<script>
import {ref, watch} from "vue";

export default {
    name: 'App',
    setup() {
        let sum = ref(0);
        let msg = ref("消息");
        watch([sum, msg], (newValue, oldValue) => {
            console.log('有变量改变了,旧值为:', oldValue, "新值为:", newValue)
        });

        return {
            sum,
            msg
        }
    },
    components: {

    }
}
这个时候可以发现newValue和oldValue都变成了一个数组,数组中的值就是两个值改变之后和改变之前的,监视ref定义的普通类型参数1不需要使用.value属性
有变量改变了,旧值为: (2) [0, '消息'] 新值为: (2) [1, '消息']
有变量改变了,旧值为: (2) [1, '消息'] 新值为: (2) [1, '消息.']
有变量改变了,旧值为: (2) [1, '消息.'] 新值为: (2) [2, '消息.']
有变量改变了,旧值为: (2) [2, '消息.'] 新值为: (2) [2, '消息..']
也可以跟vue2一样,配置是否要上来就检查数据是否更新,只需要在watch()带上第三个参数即可:
<template>
    <p>{{sum}}</p>
    <button @click="sum++">+1</button>
    <p>{{msg}}</p>
    <button @click="msg += '.'">改变消息</button>
</template>

<script>
import {ref, watch} from "vue";

export default {
    name: 'App',
    setup() {
        let sum = ref(0);
        let msg = ref("消息");
        watch([sum, msg], (newValue, oldValue) => {
            console.log('有变量改变了,旧值为:', oldValue, "新值为:", newValue)
        },{
            immediate: true
        });

        return {
            sum,
            msg
        }
    },
    components: {

    }
}
</script>
监视一个reactive
监视reactive对象时存在着多种情况:
- 当监视一个
reactive对象时,深度监视是默认开启且无法关闭的,并且无法得到旧值 - 当监视一个对象的普通属性(不为对象类型)时,
watch()的第一个参数不能直接写对象.属性,必须要写为() => 对象.属性,这个时候可以监视到旧值的变化 - 当监视一个对象的属性(对象类型)时:
watch()第一个参数为对象.属性(对象类型的)时,深度监视是默认开启且无法关闭的watch()第一个参数为() => 对象.属性(对象类型的)时,深度监视是默认关闭的,需要手动开启,否则收不到变化
<template>
    <p>{{person}}</p>
    <button @click="person.name += '.'">改变姓名</button>
    <button @click="person.age++">增加年龄</button>
    <button @click="person.jobs.job1.money++">增加工资</button>
</template>

<script>
import {ref, watch, reactive} from "vue";

export default {
    name: 'App',
    setup() {
        let person = reactive({
            name: "人",
            age: 10,
            jobs: {
                job1: {
                    money: 100
                }
            }
        })

        // 监视一个对象,但无法监视到旧的值
        watch(person, (newValue, oldValue) => {
            console.log("person对象改变了, 新值:", newValue, ",旧值(无法检测到)", oldValue);
        })
        // 监视一个对象中的某个属性的改变,这个属性是基本类型的
        watch(() => person.age, (newValue, oldValue) => {
            console.log("person对象的age改变了, 新值:", newValue, ",旧值(可以检测到)", oldValue);
        })
        // 监视一个对象中的某个属性,这个属性又是一个对象(1)
        watch(person.jobs, (newValue, oldValue) => {
            console.log("person对象的job改变了--1, 新值:", newValue, ",旧值(无法检测到)", oldValue);
        })
        // 监视一个对象中的某个属性,这个属性又是一个对象(2),需要开启deep,否则无法监视到
        watch(() => person.jobs, (newValue, oldValue) => {
            console.log("person对象的job改变了--2, 新值:", newValue, ",旧值(无法检测到)", oldValue);
        }, {
            deep: true
        })
        return {
            person
        }
    },
    components: {

    }
}
</script>
watchEffect
需要引入:
import {watchEffect} from 'vue';
一个更强大的watch()
只需要填写一个回调,回调中用到了那个属性或者对象,这个属性或者对象就被监视:
<template>
    <p>{{person}}</p>
    <button @click="person.name += '.'">改变姓名</button>
    <button @click="person.age++">增加年龄</button>
    <button @click="person.jobs.job1.money++">增加工资</button>
</template>

<script>
import {watchEffect, reactive} from "vue";

export default {
    name: 'App',
    setup() {
        let person = reactive({
            name: "人",
            age: 10,
            jobs: {
                job1: {
                    money: 100
                }
            }
        })

        watchEffect(() => {
            const money = person.jobs.job1.money;
            console.log("money变了,值为:", money);
        })

        watchEffect(() => {
            const {name} = person;
            console.log("name变了,值为:", name);
        })

        return {
            person
        }
    },
    components: {

    }
}
</script>
name变了,值为: 人.
name变了,值为: 人..
name变了,值为: 人...
name变了,值为: 人....
money变了,值为: 101
money变了,值为: 102
money变了,值为: 103
生命周期
生命周期示意图:

以上生命周期可以依旧按照Vue2的方式和setup()平级写,也可以写在setup()中
生命周期函数需要经过:
beforeCreate()created()beforeMount()mounted()- 以上回调在创建时依次执行,以下回调在销毁时依次执行
beforeUnmount()unmounted()
也可以使用组合式api写在setup中:
-
引入:
import {onBeforeMount, onMounted, onBeforeUpdate, onUpdated, onBeforeUnmount, onUnmounted} from "vue"; -
回调名称(() => {}) -
以下为上图和组合式
api的对应: -
beforeCreate()->setup() -
created()->setup() -
beforeMount()->onBeforeMount() -
mounted()->onMounted() -
以上回调在创建时依次执行,以下回调在销毁时依次执行
-
beforeUnmount()->onBeforeUnmount() -
unmounted()->onUnmounted()
如果普通方式和setup()方式同时存在,那么先执行setup()中的,再执行普通方式的
<template>
    <p>{{ count }}</p>
    <button @click="count++">增加</button>
</template>

<script>
import {ref} from "vue";
import {onBeforeMount, onMounted, onBeforeUpdate, onUpdated, onBeforeUnmount, onUnmounted} from "vue";

export default {
    name: "MyComponent",
    emits: ['hello'],
    setup(props, context) {
        console.log("setup")
        let count = ref(1);
        onBeforeMount(() => {
            console.log("onBeforeMount");
        });
        onMounted(() => {
            console.log("onMounted");
        });
        onBeforeUpdate(() => {
            console.log("onBeforeUpdate");
        });
        onUpdated(() => {
            console.log("onUpdated");
        });
        onBeforeUnmount(() => {
            console.log("onBeforeUnmount");
        });

        onUnmounted(() => {
            console.log("onUnmounted");
        });
        return {
            count
        }
    }
    ,
    beforeCreate() {
        console.log("beforeCreate")
    },
    created() {
        console.log("created")
    },
    beforeMount() {
        console.log("beforeMount")
    },
    mounted() {
        console.log("mounted")
    },
    beforeUpdate() {
        console.log("beforeUpdate")
    },
    updated() {
        console.log("updated")
    },
    beforeUnmount() {
        console.log("beforeUnmount")
    },
    unmounted() {
        console.log("unmounted")
    }
}
</script>
<template>
    <button @click="flag = !flag">显示/隐藏</button>
    <my-component v-if="flag" />
</template>

<script>
import {ref, watchEffect, reactive} from "vue";
import MyComponent from "@/components/MyComponent";

export default {
    name: 'App',
    setup() {
        let flag = ref(true);
        return {
            flag
        }
    },
    components: {
        MyComponent
    }
}
</script>
setup
beforeCreate
created
onBeforeMount
beforeMount
onMounted
mounted
onBeforeUnmount
beforeUnmount
onUnmounted
unmounted
应用:子组件添加鼠标移动时获取坐标的功能,当隐藏子组件时撤销获取坐标的事件:
<template>
    <p>x: {{ x }}</p>
    <p>y: {{ y }}</p>
</template>

<script>
import {ref} from "vue";
import {onBeforeMount, onMounted, onBeforeUpdate, onUpdated, onBeforeUnmount, onUnmounted} from "vue";

export default {
    name: "MyComponent",
    emits: ['hello'],
    setup(props, context) {
        let x = ref(0);
        let y = ref(0);
        let mousemove = e => {
            x.value = e.pageX;
            y.value = e.pageY;
            console.log('x = ',x.value, ', y = ', y.value)
        }
        onMounted(() => {
            window.addEventListener("mousemove",mousemove);
        });

        onUnmounted(() => {
            window.removeEventListener("mousemove", mousemove)
        });
        return {
            x,
            y
        }
    }
}
</script>
可以进行模块化:
-
新建一个
js文件,文件内容为:-
import {onMounted, onUnmounted, ref} from "vue";

export let mousemove = () => {
    let x = ref(0);
    let y = ref(0);
    let mousemove = e => {
        x.value = e.pageX;
        y.value = e.pageY;
        console.log('x = ', x.value, ', y = ', y.value)
    }
    onMounted(() => {
        window.addEventListener("mousemove", mousemove);
    });

    onUnmounted(() => {
        window.removeEventListener("mousemove", mousemove)
    });
    return {
        x,
        y
    }
}
-
-
<template>
    <p>x: {{ p.x }}</p>
    <p>y: {{ p.y }}</p>
</template>

<script>
import {mousemove} from "@/hook/mousemove";

export default {
    name: "MyComponent",
    emits: ['hello'],
    setup(props, context) {
        let p = mousemove();
        return {
            p
        }
    }
}
</script>

<style scoped>

</style>
toRef
应用场景:有的深度比较深的对象(具有响应式的),想要用一个变量进行表示某个属性又不想让它失去响应式
例如以下对象:
let obj = reactive({
    name: 'name',
    info: {
        name: 'info',
        child: {
            name: 'child'
        }
    }
})
想要一个变量用来表示obj.info.child,如果使用let child = obj.info.child,那么此时的child不具备响应式,此时:
let child = obj.info.child;
// 等价于
let child = {
    name: 'child'
}
如果使用let child = ref(obj.info.child)
- 那么此时的
child中的内容相当于一个新的{name: 'child'} - 更改
child中的值不影响obj.info.child中的值 - 相当于深拷贝了一份
使用前需要:
import {toRef} from "vue";
用法:let 变量名 = toRef(对象.上一级属性, '具体的属性名')
<template>
    <p>{{person}}</p>
    <p>{{job1}}</p>
    <button @click="person.name += '.'">改变姓名</button>
    <button @click="person.age++">增加年龄</button>
    <button @click="person.jobs.job1.money++">增加工资</button>
    <button @click="job1.money++">增加工资(job1)</button>
</template>

<script>
import {toRef, reactive} from "vue";
import MyComponent from "@/components/MyComponent";

export default {
    name: 'App',
    setup() {
        let person = reactive({
            name: "人",
            age: 10,
            jobs: {
                job1: {
                    money: 100
                }
            }
        })

        let job1 = toRef(person.jobs, 'job1');

        return {
            person,
            job1
        }
    },
    components: {
        MyComponent
    }

}
</script>
toRefs
需要import {toRefs} from 'vue'
可以将一个对象中的所有的属性都进行拆分:
return {
    ...toRefs(对象)
}
例如:
<template>
    <p>{{person}}</p>
    <p>{{job1}}</p>
    <p>--------拆分后---------</p>
    <p>{{name}}</p>
    <p>{{age}}</p>
    <p>{{jobs}}</p>
    <button @click="person.name += '.'">改变姓名</button>
    <button @click="person.age++">增加年龄</button>
    <button @click="person.jobs.job1.money++">增加工资</button>
    <button @click="job1.money++">增加工资(job1)</button>
</template>

<script>
import {toRef, reactive, toRefs} from "vue";
import MyComponent from "@/components/MyComponent";

export default {
    name: 'App',
    setup() {
        let person = reactive({
            name: "人",
            age: 10,
            jobs: {
                job1: {
                    money: 100
                }
            }
        })


        let job1 = toRef(person.jobs, 'job1');

        return {
            person,
            job1,
            ...toRefs(person)
        }
    },
    components: {
        MyComponent
    }

}
</script>
shallowReactive 和 ShallowRef
shallow中文为浅的、肤浅、表面,读音为ˈʃæloʊ,效果是只处理浅层次的响应式:
<template>
    <p>{{person}}</p>

    <button @click="person.name += '.'">改变姓名</button>
    <button @click="person.age++">增加年龄</button>
    <button @click="person.jobs.job1.money++">增加工资</button>
</template>

<script>
import {toRef, reactive, toRefs, shallowReactive} from "vue";
import MyComponent from "@/components/MyComponent";

export default {
    name: 'App',
    setup() {
        let person = shallowReactive({
            name: "人",
            age: 10,
            jobs: {
                job1: {
                    money: 100
                }
            }
        })

        return {
            person
        }
    },
    components: {
        MyComponent
    }

}
</script>
上例中只会处理name、age的响应式,更深层次的jobs.job1.money的值改变时不会进行响应式
{
            name: "人",
            age: 10,
            jobs: {
                job1: {
                    money: 100
                }
            }
        }
shallowRef的作用是:当传递给这个函数的参数普通类型时,可以拥有响应式,如果是一个对象,那么有响应式
readonly和shallowReadonly
readonly可以将这个对象变为只读的,也就是无法发在修改这个对象中的属性值(包括深层次的),shallowReadonly可以只限制修改浅层次的属性,深层次的不受限制 可以继续修改
<template>
    <p>{{person}}</p>
    <p>{{x}}</p>

    <button @click="person.name += '.'">改变姓名</button>
    <button @click="person.age++">增加年龄</button>
    <button @click="person.jobs.job1.money++">增加工资</button>
    <button @click="x++">x++</button>
</template>

<script>
import {toRef, reactive, toRefs, shallowReactive, shallowRef} from "vue";
import MyComponent from "@/components/MyComponent";
import {readonly} from "vue";

export default {
    name: 'App',
    setup() {
        let person = shallowReactive({
            name: "人",
            age: 10,
            jobs: {
                job1: {
                    money: 100
                }
            }
        })
        let x = shallowRef(0);
        person = readonly(person)

        return {
            person,
            x
        }
    },
    components: {
        MyComponent
    }

}
</script>
对于普通类型的,使用shallowReadonly和readonly效果一样
toRaw和markRaw
raw中文为未加工的,原生的,toRaw可以查看到原始的数据,相当于reactive、ref的逆操作
<template>
    <p>{{ person }}</p>

    <button @click="person.name += '.'">改变姓名</button>
    <button @click="person.age++">增加年龄</button>
    <button @click="person.jobs.job1.money++">增加工资</button>
    <button @click="rawData">查看原始内容</button>
</template>

<script>
import {reactive, toRaw, ref} from "vue";

export default {
    name: 'App',
    setup() {
        let person = reactive({
            name: "人",
            age: 10,
            jobs: {
                job1: {
                    money: 100
                }
            }
        })

        let rawData = () => {
            console.log(person)
            console.log(toRaw(person));
        }

        return {
            person,
            rawData
        }
    },
    components: {}

}
</script>
结果:
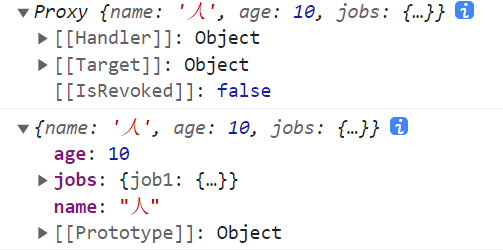
只能处理对象,不能处理普通数据类型
markRaw
当一个属性被添加后无法继续修改这个属性
<template>
    <p>{{ person }}</p>
    <p>{{person.info}}</p>

    <button @click="person.name += '.'">改变姓名</button>
    <button @click="person.age++">增加年龄</button>
    <button @click="person.jobs.job1.money++">增加工资</button>
    <button @click="rawData">查看原始内容</button>
    <button @click="add">添加属性</button>
    <button @click="change">更改person.info.name</button>
</template>

<script>
import {reactive, toRaw, ref, markRaw} from "vue";

export default {
    name: 'App',
    setup() {
        let person = reactive({
            name: "人",
            age: 10,
            jobs: {
                job1: {
                    money: 100
                }
            }
        })

        let rawData = () => {
            console.log(person)
            console.log(toRaw(person));
        }

        let add = () => {
            person.info = markRaw({
                name: 'info'
            });
        }

        let change = () => {
            if(person.info) {
                person.info.name += '.';
            }
        }

        return {
            person,
            rawData,
            add,
            change
        }
    },
    components: {}

}
</script>
此时再次改变person.info中的内容将不会生效
应用场景:跳过大量不需要进行响应式的数据以提高性能
消息传递
父组件可以向一切后代传递消息,父组件通过provider('消息标识', 消息)进行传送消息,provider仅能用于setup()中,后代组件通过let 变量名 = inject('消息标识')
爷爷:
<template>
    <div id="div1">
        <p>爷爷组件</p>
        <son />
    </div>
</template>

<script>
import {reactive, toRaw, ref, markRaw} from "vue";
import son from "@/components/son";
import {provide} from "vue";

export default {
    name: 'App',
    setup() {
        provide('msg', {
            name: "这是一条消息",
            content: {
                msg: '这是内容'
            }
        })


    },
    components: {
        son
    }

}
</script>
儿子组件:
<template>
    <div id="div">
        <p>儿子组件</p>
        <grandson />
    </div>
</template>

<script>
import Grandson from "@/components/grandson";
export default {
    name: "son",
    components: {
        Grandson
    }
}
</script>
孙子组件:
<template>
    <div>
        <p>孙子组件</p>
        <p>{{msg}}</p>
    </div>
</template>

<script>
import {inject} from "vue";
export default {
    name: "grandson",
    setup() {
        let msg = inject('msg')
        return {
            msg
        }
    }
}
</script>
响应式的数据判断
isRef判断是否是ref对象
isReactive判断是否Reactive创建的
isReadonly判断是否只读的readonly创建的
isProxy判断是否由reactive或者readonly方法创建的代理
Teleport
在传递消息的例子中,HTML代码中内容为:
	<div id="app" data-v-app="">
		<div id="div1">
			<p>爷爷组件</p>
			<div id="div" data-v-226932b2="">
				<p data-v-226932b2="">儿子组件</p>
				<div data-v-36d8abd4="" data-v-226932b2="">
					<p data-v-36d8abd4="">孙子组件</p>
					<p data-v-36d8abd4="">{
						"name": "这是一条消息",
						"content": {
						"msg": "这是内容"
						}
						}</p>
				</div>
			</div>
		</div>
	</div>
此时孙子组件能够依次的排到最里层,可以使用teleport
teleport读音为ˈteləˌpôrt,中文为瞬移,也就是说可以把一个子组件的位置指定到某个标签下,以下代码是代表把这个孙子组件放到body标签下
<template>
    <teleport to="body">
        <div>
            <p>孙子组件</p>
            <p>{{ msg }}</p>
        </div>
    </teleport>
</template>

<script>
import {inject} from "vue";

export default {
    name: "grandson",
    setup() {
        let msg = inject('msg')
        return {
            msg
        }
    }
}
</script>
这个时候代码为:
	<body>
		<noscript>
			<strong>We're sorry but vue3-learn doesn't work properly without JavaScript enabled. Please enable it to
				continue.</strong>
		</noscript>
		<div id="app" data-v-app="">
			<div id="div1">
				<p>爷爷组件</p>
				<div id="div" data-v-226932b2="">
					<p data-v-226932b2="">儿子组件</p>
					<!--teleport start-->
					<!--teleport end-->
				</div>
			</div>
		</div>
		<!-- built files will be auto injected -->


		<div data-v-36d8abd4="">
			<p data-v-36d8abd4="">孙子组件</p>
			<p data-v-36d8abd4="">{
				"name": "这是一条消息",
				"content": {
				"msg": "这是内容"
				}
				}</p>
		</div>
	</body>
API 调整
| 2.X全局API | 3.x实例API |
|---|---|
Vue.config.xxx |
app.config.xxx |
Vue.component |
app.component |
Vue.directive |
app.directive |
Vue.mixin |
app.mixin |
Vue.use |
app.use |
Vue.prototype |
app.config.globalProperties |
Q.E.D.